Files, forums and links
Projects collect more than tasks. This page covers three ways to share material with your team: files (with versions and check-out), discussion forums, and web links.
Files
Click Files in the top menu to see the files you have access to.
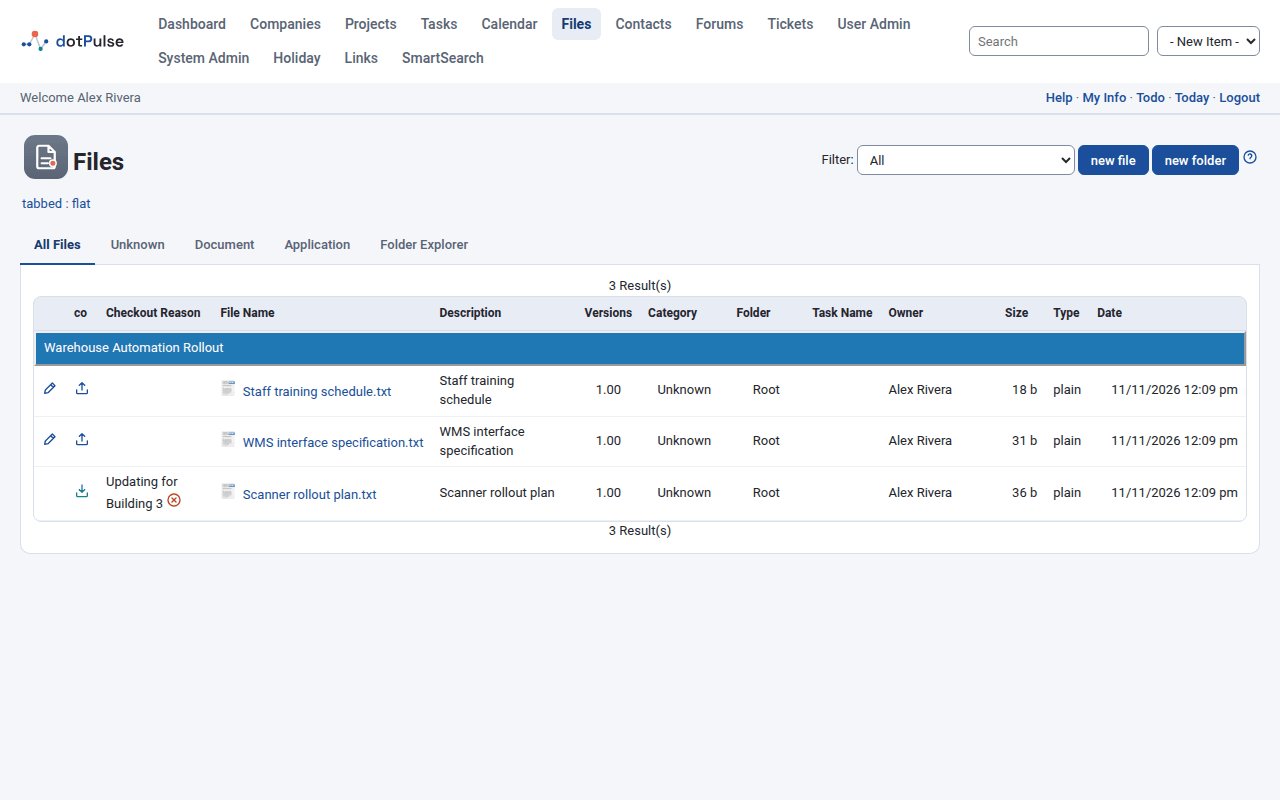
The tabs sort the files by category: All Files, then one tab per category (Unknown, Document and Application on a standard site). The last tab, Folder Explorer, shows the files by folder. Use Filter to show only the files of one project.
Each row shows the file name (click it to download), its description, version, category, folder, task, owner, size, type and date. Files with older versions show the number of versions in brackets next to the version; click it to list them.
You also find files on a project's Files tab and on a task's Files tab.
Upload a file
- Go to Files and click new file. From a project or a task, you can also click new file in the title area, or Attach a file on the project's Files tab.
- Fill in the form.
- Click submit.
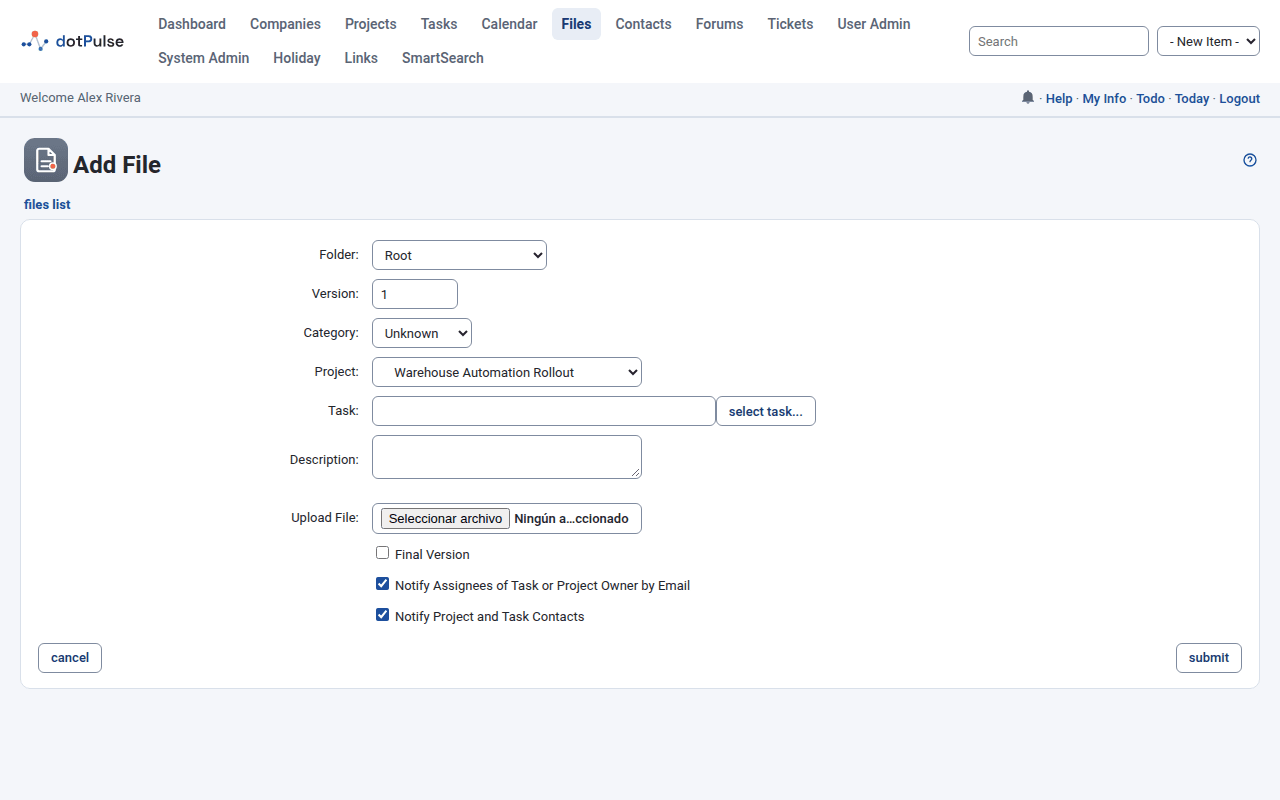
| Field | Meaning |
|---|---|
| Folder | Where the file goes. Root is the top level. |
| Version | A version number for the file. It starts at 1. |
| Category | Unknown, Document, Application or another category set up on your site. |
| Project | The project the file belongs to. Leave it on None for a general file. |
| Task | Click select task... to link the file to a task of the chosen project. Pick the project first. |
| Description | What the file is. |
| Upload File | Choose the file on your computer. |
| Final Version | Locks the file as final (see below). |
| Notify Assignees of Task or Project Owner by Email | Emails the task's assignees, or the project owner if there is no task. Ticked by default. |
| Notify Project and Task Contacts | Emails the contacts of the project and the task. Ticked by default. |
Files linked to a task show a paper clip in the task lists. When you move a task to another project, its files move too.
Edit or delete a file
Click the edit icon at the left of a file's row. You can change its folder, category, project, task and description. If you choose a new file in Upload File, it replaces the current one without keeping the old one as a version.
To delete a file, open it for editing and click delete file, or use the delete icon in Folder Explorer.
Keep versions with check-out and check-in
Check-out tells your team that you are working on a file, and lets you save your changes as a new version.
- Click the check-out icon in the co column.
- Type a CO Reason, choose who to notify, and click submit. The file downloads, and the list shows it as checked out by you, with your reason.
- Edit the file on your computer.
- Click the check-in icon in the co column. The page Checking in opens.
- Choose Minor Revision or Major Revision, pick the changed file in Upload File, and click submit.
A minor revision adds 0.01 to the version number (1 becomes 1.01). A major revision moves to the next whole number (1.01 becomes 2). The older versions stay in the list.
While a file is checked out, others see your name in the co column and cannot edit it. You can cancel your check-out with the cancel icon next to the reason. Administrators and the project owner can cancel it too.
Note
Final Version marks the file as final. The co column then shows final and nobody can check the file out or edit it any more.
Work with folders
Click new folder on the Files page. Give it a Folder Name, an optional Description, and choose its parent in Subfolder of.
The Folder Explorer tab shows the folder tree. The icons next to each folder let you add a subfolder, add a file to it, or delete it. Inside a folder you can edit it or go back to the parent folder or to the root.
To move several files at once, tick them in Folder Explorer, pick a target in Move to Folder or Move to Project (or No Project Association), and click Go.
Forums
Forums are discussion boards. Each forum belongs to a project, so the talk stays next to the work.
Click Forums in the top menu to see the forums of active projects.
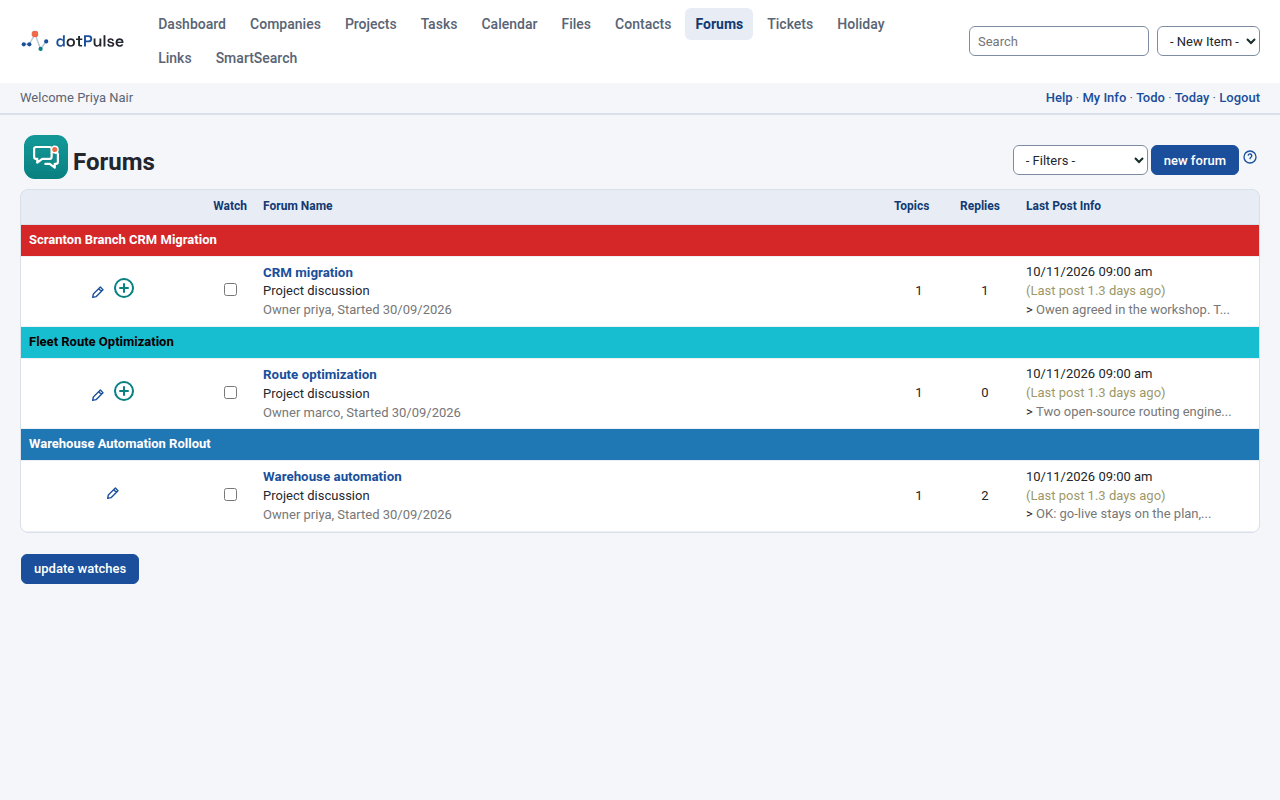
The list shows each forum's project, name, owner, number of Topics and Replies, and the last post. Use the filter at the top to show My Forums, My Watched, My Projects, My Company or Inactive Projects (forums of archived projects).
A project's Forums tab lists just that project's forums.
Create a forum
- Go to Forums and click new forum. From a project's Forums tab, the new forum button there works too.
- Fill in Forum Name, Related Project, Owner (you by default), Moderator and Description.
- Click submit.
The moderator can edit and delete any message in the forum.
Start a topic and reply
- Click a forum's name.
- Click start a new topic.
- Type a Subject and your Message, then click submit.
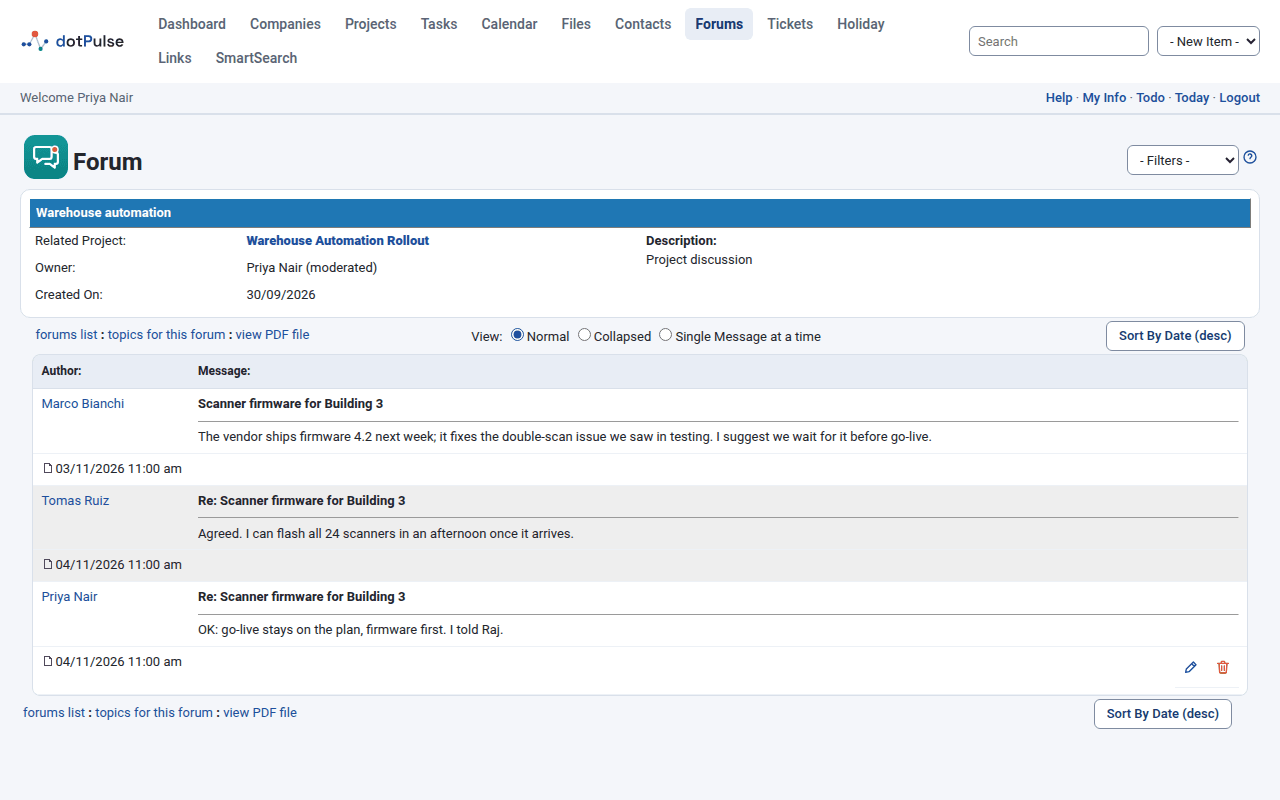
Click a topic to read it. Then:
- Post Reply answers the topic. The reply quotes the message you answer.
- New Topic starts another topic in the same forum.
- Sort By Date switches between oldest first and newest first.
- View changes the layout: Normal, Collapsed or Single Message at a time.
You can edit or delete your own messages with the icons next to them.
In the topic list, an icon marks topics with posts you have not read yet.
Watch a forum or a topic
Watching sends you an email when someone posts.
- To watch whole forums, tick their boxes in the Watch column of the forums list and click update watches.
- To watch single topics, open the forum, tick the topics in the Watch column and click update watches.
Untick a box and click update watches again to stop watching.
Links
The Links add-on keeps useful web addresses with your projects. If your site has it, click Links in the top menu.
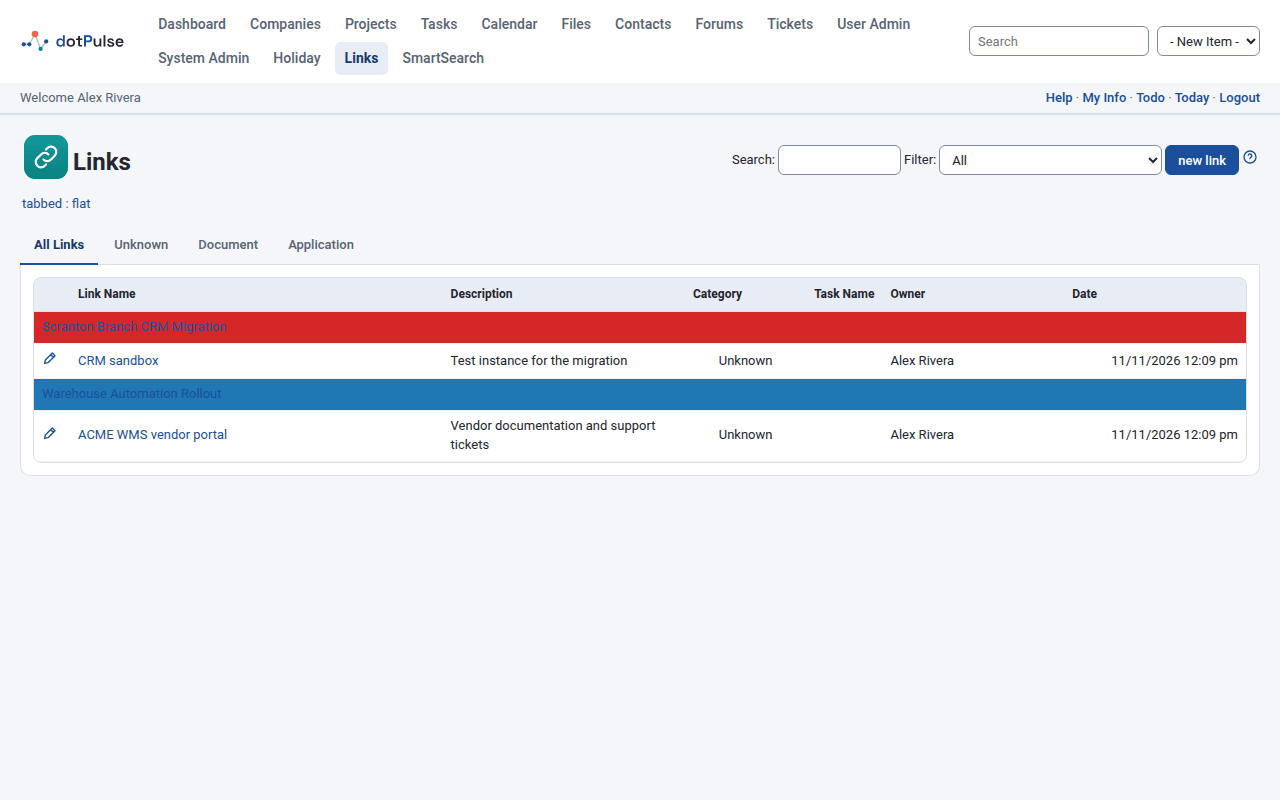
The tabs sort the links by category: All Links, then one tab per category (Unknown, Document and Application on a standard site). Use Search to find a link by name or description, and Filter to show one project's links.
A project's Links tab lists the links of that project.
Add a link
- Go to Links and click new link.
- Fill in Link Name, Category, Project, Task (click select task...), Description and Link URL.
- Click submit.
When you edit a link, the go link next to its name opens the address in a new window. Click a link's name in the list to open it.