Installing dotPulse
A web installer sets up the database and writes the configuration file for you. It takes three pages. Before you start, check the requirements.
1. Get the code
Download the source code of the latest release from the GitHub releases page and unpack it. Or clone the repository: the master branch holds the stable releases.
git clone --branch master https://github.com/davmont/dotPulse.git dotpulse
Put the files in your web server's document root, or in a subdirectory of it, for example /var/www/html/dotpulse.
Note
A release archive leaves out the development files (tools/, tests/, docker/, the Makefile). A clone has them. The server doesn't need them, and the .htaccess rules refuse requests for them.
2. Prepare the database
Create a MySQL or MariaDB user for dotPulse. You have two options:
- Give the user the right to create databases. The installer then creates the database itself.
- Create an empty database yourself and give the user full rights on it.
For example, in the MySQL or MariaDB client:
CREATE DATABASE dotpulse CHARACTER SET utf8mb4 COLLATE utf8mb4_general_ci;
CREATE USER 'dotpulse'@'localhost' IDENTIFIED BY 'choose-a-strong-password';
GRANT ALL PRIVILEGES ON dotpulse.* TO 'dotpulse'@'localhost';
3. Let the web server write where it must
The web server user (often www-data or apache) must be able to write to includes/, files/ and files/temp/. For example:
cd /var/www/html/dotpulse
chown www-data includes files files/temp
If the installer can't write includes/config.php, it still works: at the end it shows you the content of the file to create by hand.
4. Run the installer
Open the install/ folder of your site in a browser, for example https://pm.example.com/install/.
Page 1: Welcome and requirements
The first page shows a Check for Requirements table. Each line has a green tick or a red cross:
- the PHP version, the extensions and the database connectors (only MySQL/MariaDB Support matters);
- Check for Directory and File Permissions: whether
includes/config.php,files/,files/cache/,files/temp/andlocales/en/are writable; - Recommended PHP Settings and Other Recommendations.
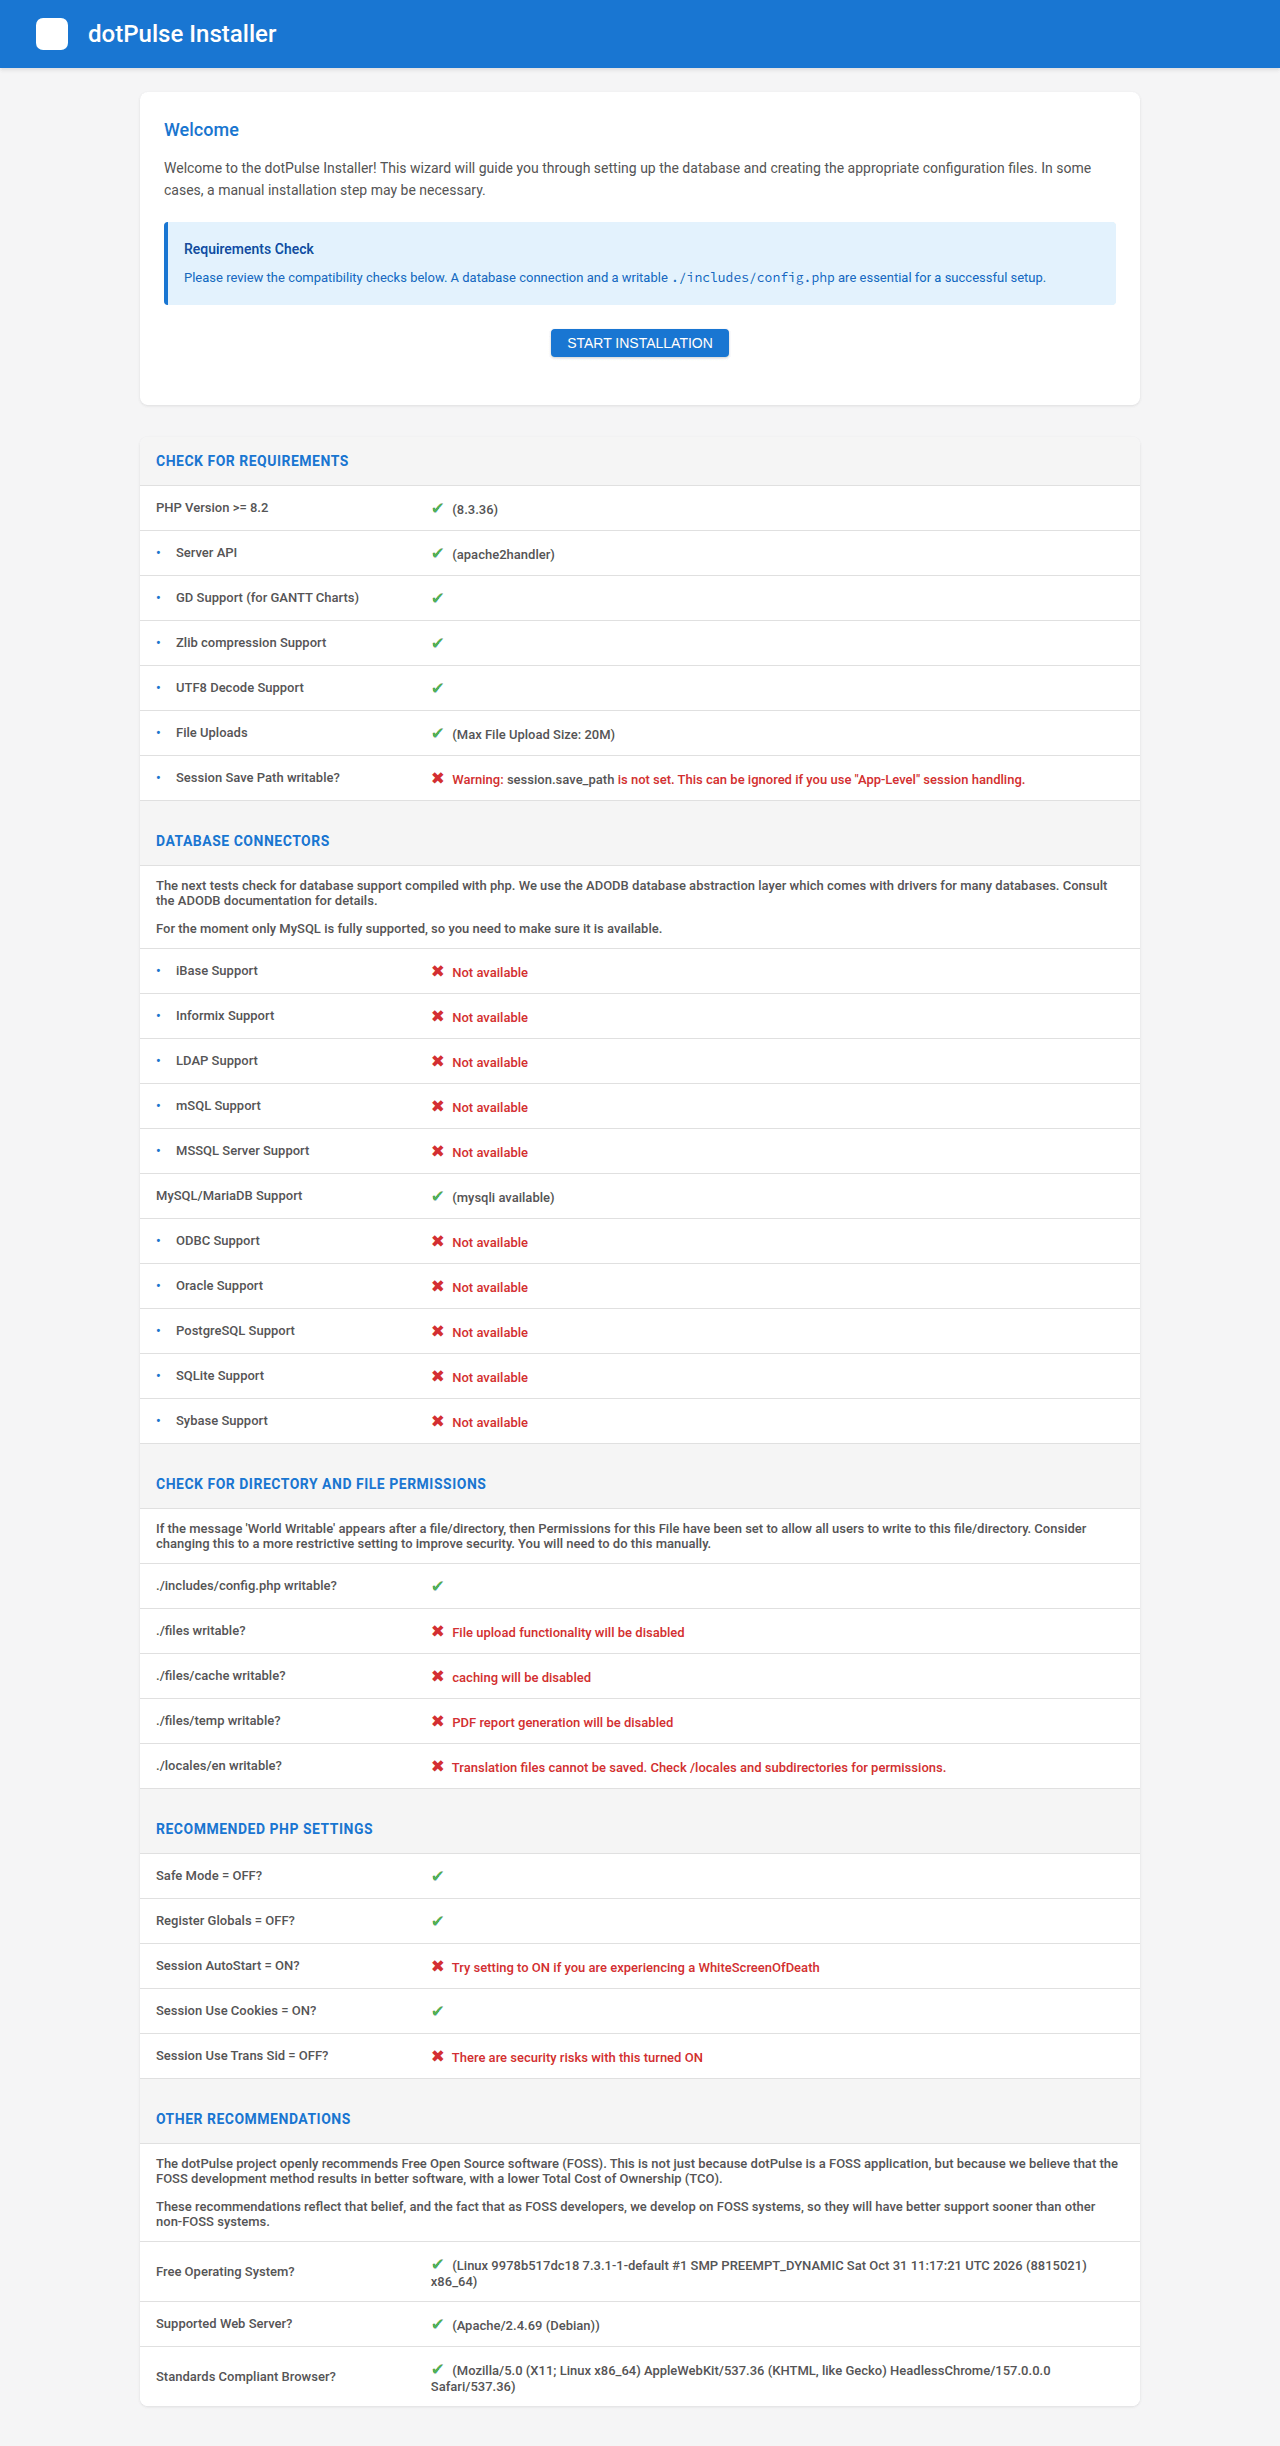
A red cross is a warning, not a stop. Fix what you need and reload the page.
World Writable
If a folder shows World Writable, every user on the server can write to it. Restrict its permissions to the web server user once the installation works.
Click Start Installation.
Page 2: Database Configuration
Fill in the database settings:
| Field | What to enter |
|---|---|
| Database Server Type | MySQL or MariaDB, the only database dotPulse supports. |
| Database Host Name | The database server, often localhost. |
| Database Name | The database you created, or the one the installer should create. |
| Database Prefix | A prefix for every table name. The form suggests dotp_. Keep it unless you have a reason to change it. |
| Database User Name | The dotPulse database user. |
| Database User Password | That user's password. |
| Use Persistent Connection? | Leave it unticked unless you run a high-traffic site. |
| Drop Existing Database? | Tick it only to wipe a database and start over. All data in that database is lost. |
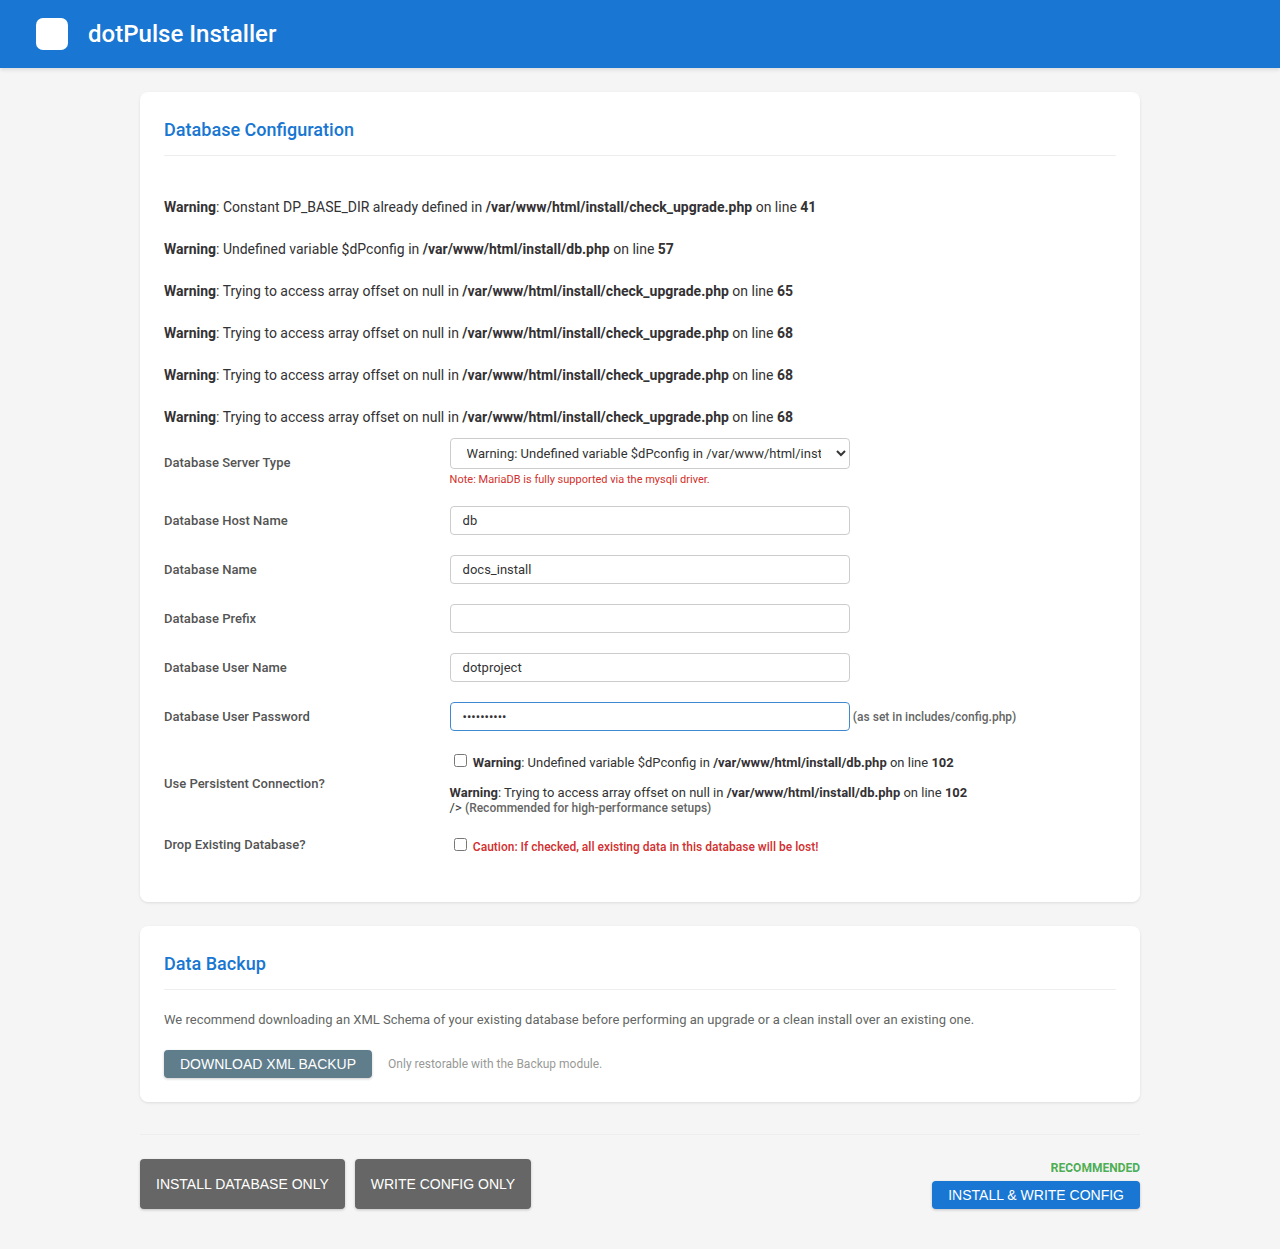
The Data Backup box offers Download XML Backup, which saves the structure and data of an existing database. You don't need it for a new installation.
At the bottom, choose what the installer does:
- install & Write Config (recommended): creates the tables and writes
includes/config.php. - install Database Only: creates the tables but leaves the configuration file alone.
- Write Config Only: writes
includes/config.phpand leaves the database alone.
Click install & Write Config.
Page 3: Installation Progress
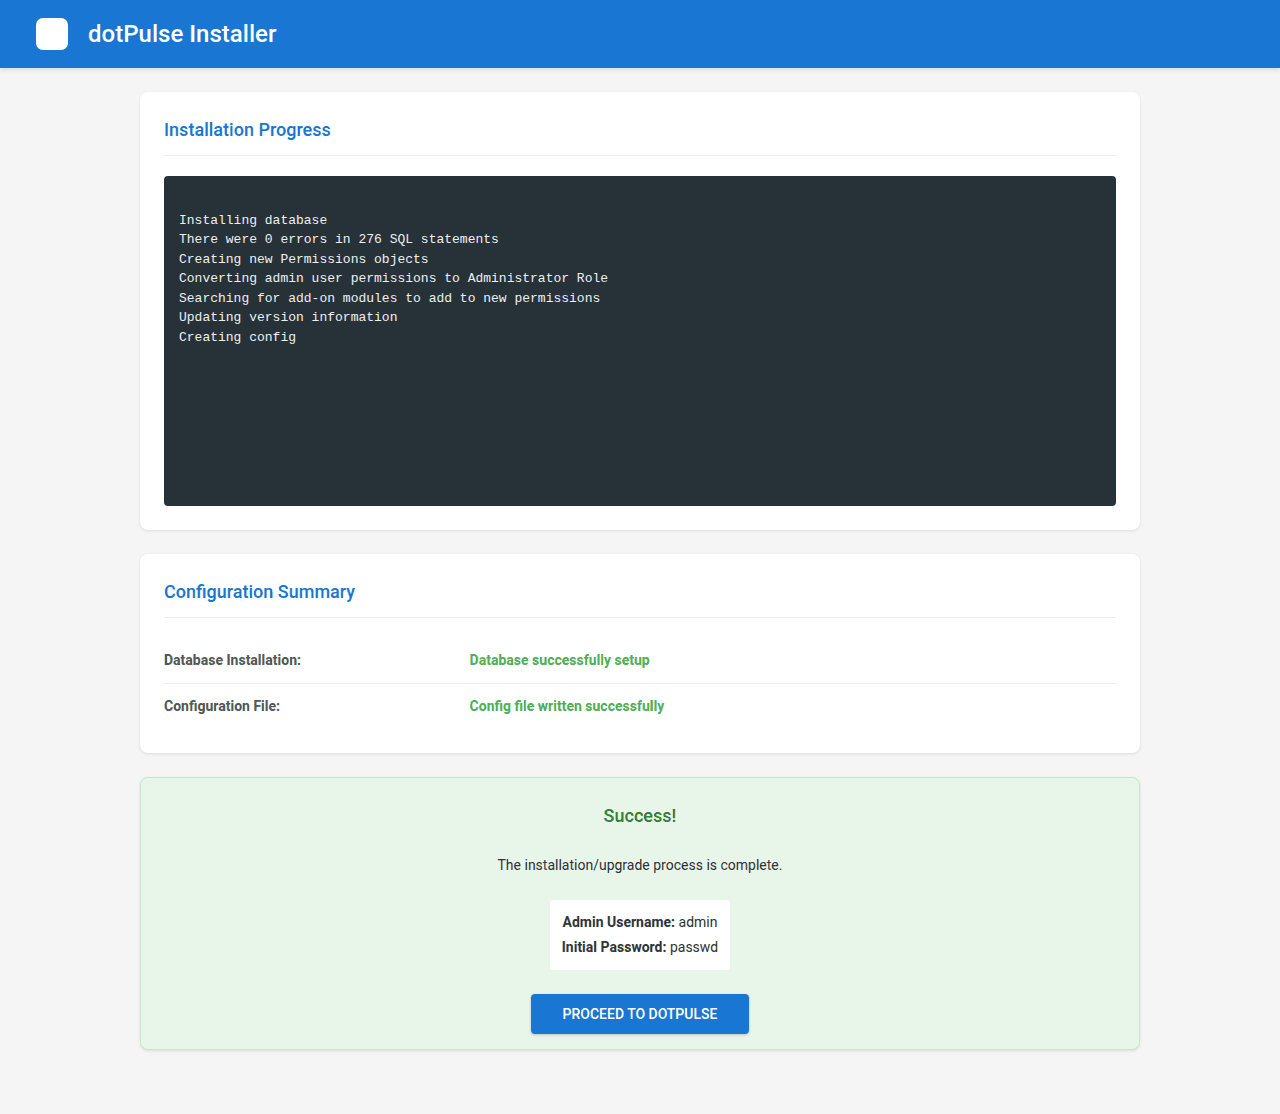
The installer creates the database (if needed), loads the tables and writes the configuration. The Configuration Summary tells you how it went:
- Database Installation: Database successfully setup, or the database error.
- Configuration File: Config file written successfully, or Config file could not be written.
If the file could not be written, the page shows its content in a text box. Create includes/config.php on the server and paste that content into it.
When everything worked, a Success! box shows the administrator's login:
- Admin Username:
admin - Initial Password:
passwd
5. Remove the installer
Delete the install/ directory from the server, or deny access to it in your web server configuration:
rm -rf /var/www/html/dotpulse/install
Until you do, the System Admin pages show a warning: The install directory is still on the server: remove it or deny access to it.
6. Log in for the first time
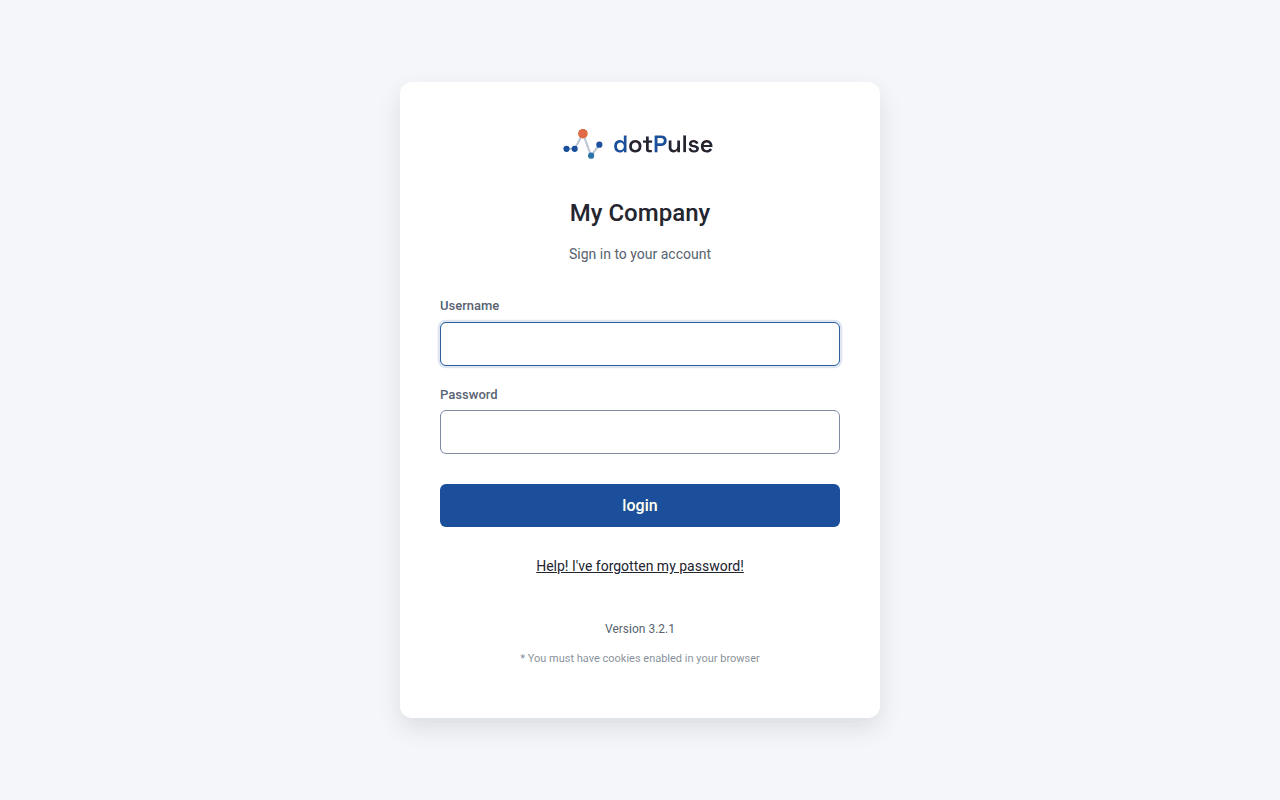
Click Proceed to dotPulse, or open your site's address. Log in with the username admin and the password passwd.
Change the password now
Everyone who knows dotPulse knows the initial password. Change it straight away: click My Info at the top of the page, then change password.
While you are on My Info, click edit this user and put your real email address in place of admin@example.com. You need it to reset your password.
The configuration file
The installer writes includes/config.php. It holds only the database settings:
$dPconfig['dbtype'] = 'mysqli';
$dPconfig['dbhost'] = 'localhost';
$dPconfig['dbname'] = 'dotpulse';
$dPconfig['dbprefix'] = 'dotp_';
$dPconfig['dbuser'] = 'dotpulse';
$dPconfig['dbpass'] = 'choose-a-strong-password';
$dPconfig['dbpersist'] = false;
$dPconfig['root_dir'] = DP_BASE_DIR;
$dPconfig['base_url'] = DP_BASE_URL;
Everything else is set in the application, under System Admin.
To configure by hand instead of letting the installer write the file, copy includes/config-dist.php to includes/config.php and edit the database settings. Then run the installer, enter the same settings, password included, and click install Database Only to create the tables. Once includes/config.php has database settings, the installer only accepts requests that carry exactly those settings.
Keep includes/config.php when you upgrade: it is not part of the code you download.
Secure the installation
The deployment security guide has the details. In short:
- Web server rules. On Apache, make sure
AllowOverridelets the.htaccessfiles work. On nginx, copy thedenyrules from the guide into yourserverblock. Then check that requests for internal files are refused: the guide has a small script that requestsincludes/config.php,vendor/autoload.php,files/and others, and each must answer 403 or 404, never 200. - HTTPS. Serve the site over HTTPS only.
- Remove
install/if you haven't yet. - Two-step login. Turn it on at least for administrators: My Info, then the Two-step login tab. The server's clock must be right (use NTP), because codes are only accepted within 30 seconds of the current time.
- Mail sender. Set a sender address so that mail from dotPulse isn't rejected as spam. See First steps.
- REST API. It is off by default. Leave it off unless something uses it.
- Audit log. System Admin › Audit log lists logins, failed logins and administrators' changes. It keeps 365 days by default.
- Behind a reverse proxy, configure Apache's
mod_remoteipor nginx'sreal_ip, so the audit log records your users' addresses and not the proxy's.
Set up the cron job
dotPulse queues task notifications, assignment mails and reminders. A script, queuescanner.php, sends them. Run it from cron every few minutes, as the web server user, with your site's public address:
# /etc/cron.d/dotpulse
*/5 * * * * www-data php /var/www/html/dotpulse/queuescanner.php --base-url=https://pm.example.com
- The script runs from the command line only. Over HTTP it answers 404.
--base-urlis required, so that the links in the mails work. Without it the script stops with exit status 2.- If two runs overlap, the second one is skipped.
Without this job, those mails are never sent.
Next
Your site is running. Go to First steps to set it up for your team.