First steps
Your site is installed and you have logged in as admin. Work through this checklist before you invite your team. It takes about half an hour.
- Change the admin password
- Review the system settings
- Create your companies and departments
- Check the roles
- Add your users
- Choose your modules
- Set up holiday calendars
- Set up email
- Create your first project
Before anything else
If you haven't yet, change the initial password: click My Info at the top of the page, then change password. See Installing.
The System Admin page
Most of the settings live under System Admin, in the main menu. Its start page shows the state of your installation:
- Attention, if the
install/directory is still on the server; - Version: the dotPulse, PHP and database versions;
- Active modules, and whether any module has an upgrade to install;
- Email: how mail is sent, and the sender address.
Below that, cards lead to every admin page, in three groups: People and access, Work and System.
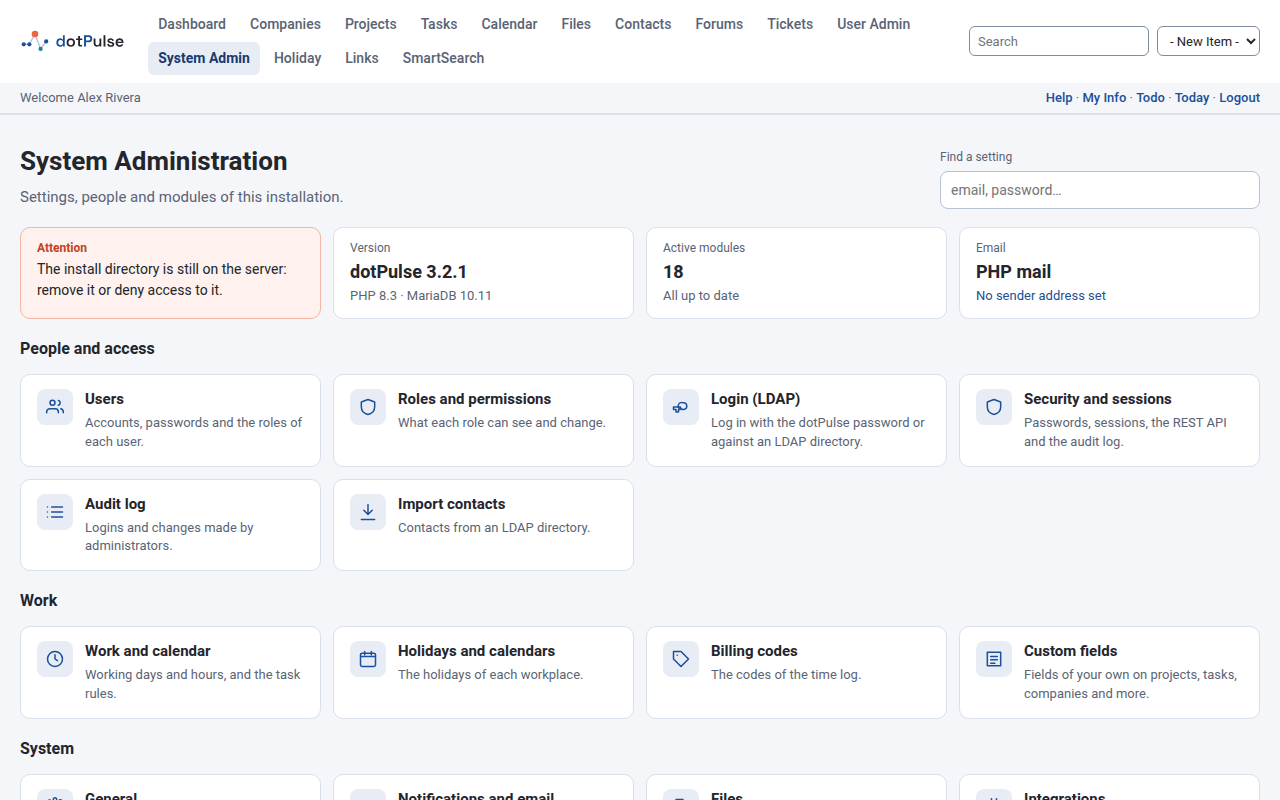
Each settings page shows the help for each setting next to it. Click Save changes at the bottom when you are done. Changes apply to every user as soon as you save them.
Tip
Looking for one setting? Type a word in Find a setting at the top of System Admin, for example email or password.
1. Review the system settings
Open System Admin › General:
- Company Name: your organisation's name. It is My Company until you change it.
- Page Title: the title in the browser tab. Default: dotPulse.
- Site Domain: your site's domain. Default: example.com.
- Host Locale: the language of the site.
- Default User Interface Style: the theme. New installations use dotPulse.
- Currency Symbol: default $.
- Default Module: the page users see after login. Default: the dashboard.
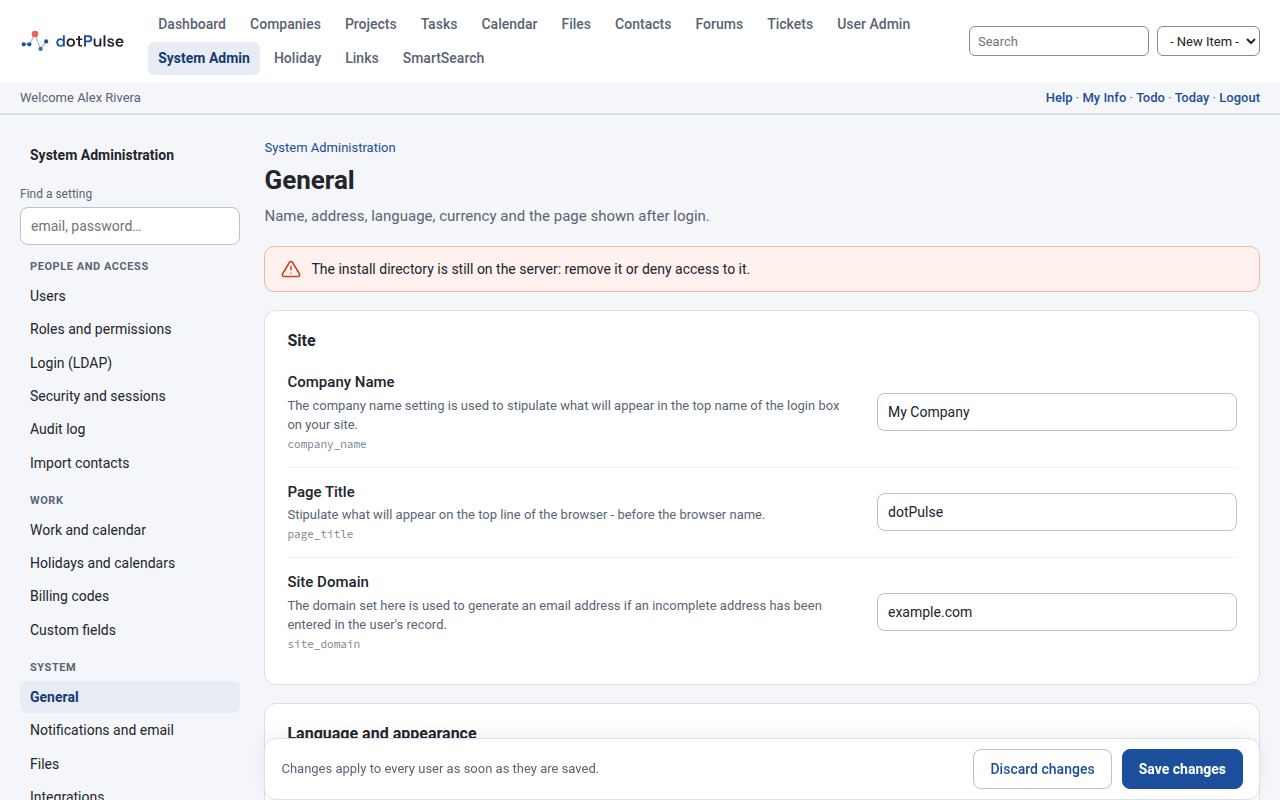
Then open System Admin › Work and calendar. Task dates and durations are calculated with these settings:
- Calendar Working Days: Monday to Friday by default.
- Calendar Start Hour and Calendar End Hour: 8 and 17 by default.
- Daily Working Hours: 8 by default.
Finally, look at System Admin › Security and sessions. Minimum Password Length is 4 by default; raise it.
Default user preferences
System Admin › Default user preferences sets the language, date and time formats, currency format and theme of new users. Each user can change their own later; see Your account and preferences.
2. Create your companies and departments
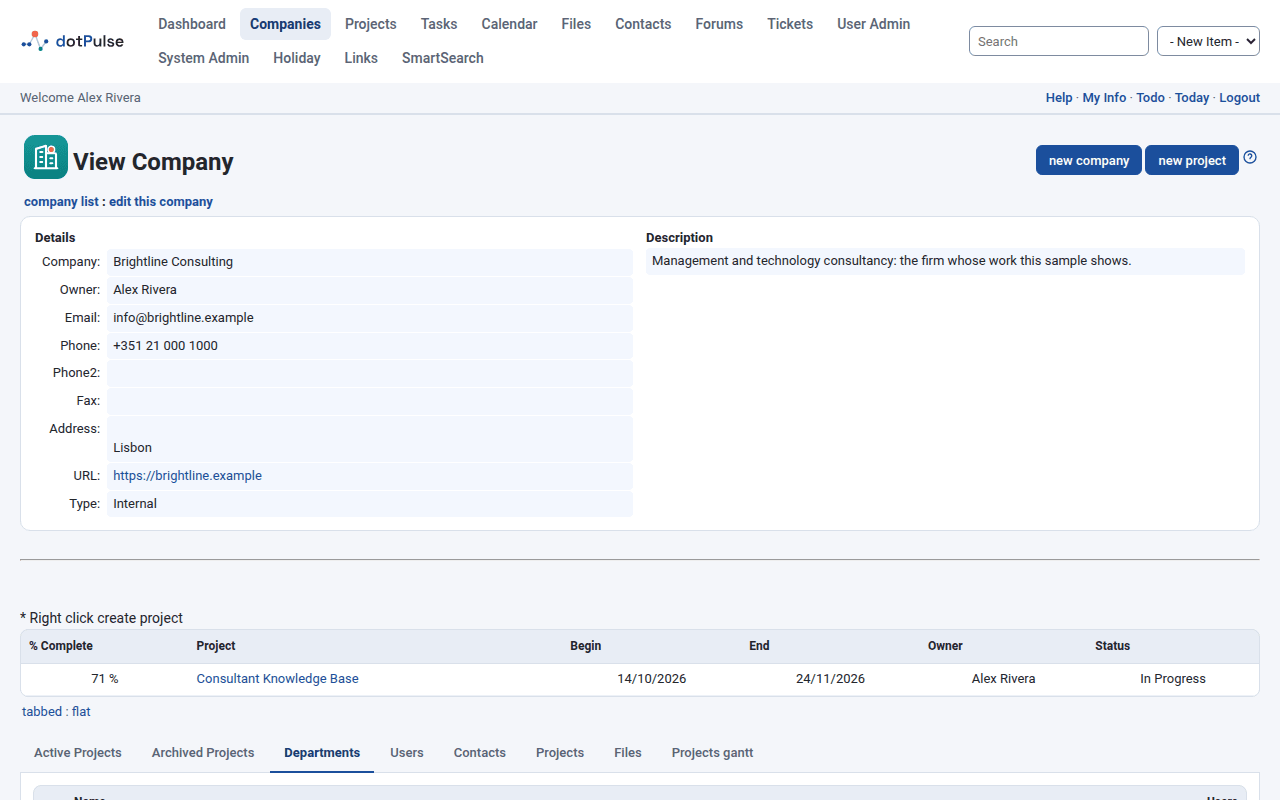
In dotPulse, every project belongs to a company. Users and contacts belong to companies too. Create your own organisation first, then your clients and suppliers.
- Click Companies in the main menu, then new company.
- Fill in the company's details and save.
- On the company's page, open the Departments tab and click new department for each department you need.
More in Companies, departments and contacts.
3. Check the roles
A role decides what its users can see and change. Open System Admin › Roles and permissions. A new installation has four roles:
- Administrator: every permission on every module, System Admin and User Admin included.
- Project worker: every permission on the other modules. This is the role for most of your team.
- Guest: can open and view the other modules, but not change anything.
- Anonymous: can open the other modules only.
Adjust the permissions of a role, or add roles of your own, before you add users. Every user must have a role to log in.
4. Add your users
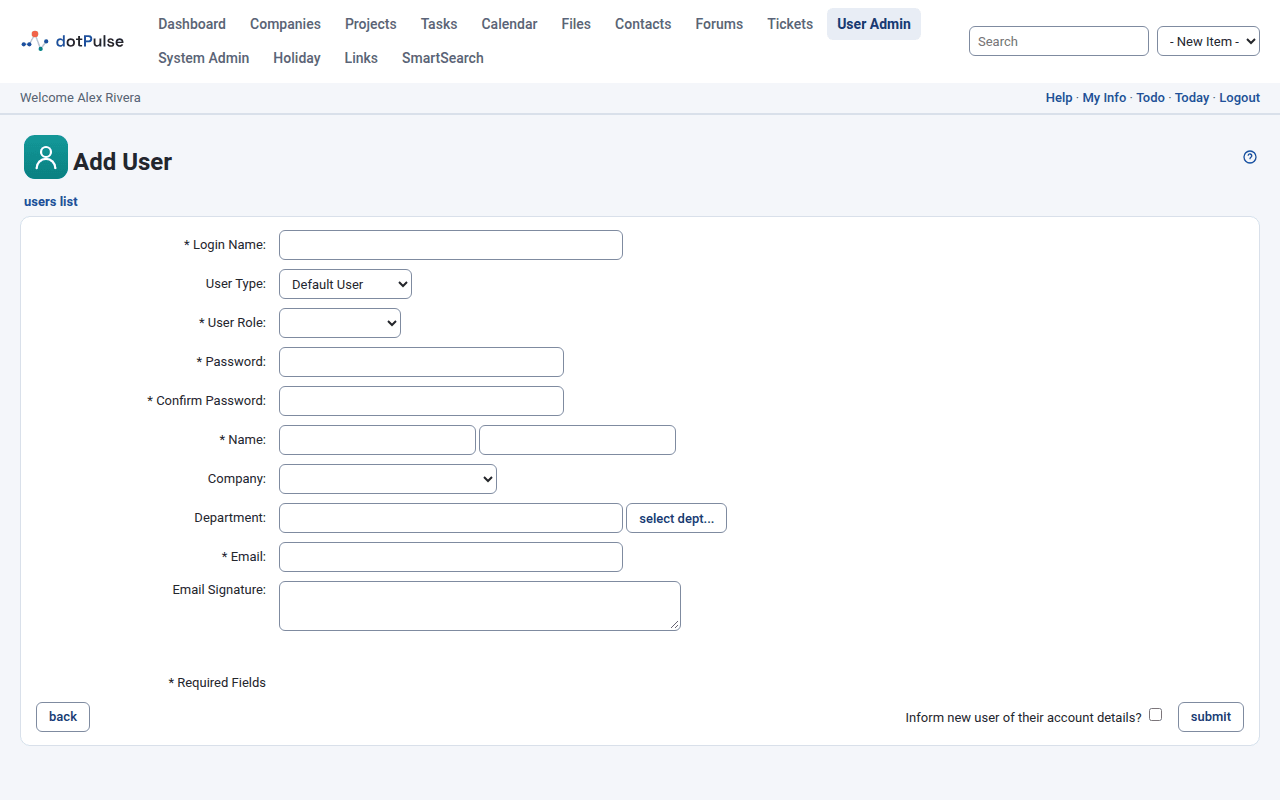
- Click User Admin in the main menu (or System Admin › Users), then add user.
- Fill in the form:
- Login Name, Password and Confirm Password;
- User Role: the role you chose for them;
- Name and Email;
- Company and Department.
- Tick Inform new user of their account details? to send them an email with the site's address and their username. The email doesn't contain the password: it asks them to set one with the forgotten-password link on the login page. Set up email first (step 7) if you want to use this.
- Click submit.
On a user's page, the Roles tab shows and changes their roles.
Two-step login
Ask your administrators to turn on two-step login: My Info, then the Two-step login tab. If someone loses their phone, an administrator can reset it from the same tab on their user page.
5. Choose your modules
dotPulse comes with many modules. A new installation has the core ones (companies, projects, tasks, calendar, files, contacts, forums and the rest). Add-on modules, such as risks, timesheets or the holiday calendars, are in the code but not installed yet.
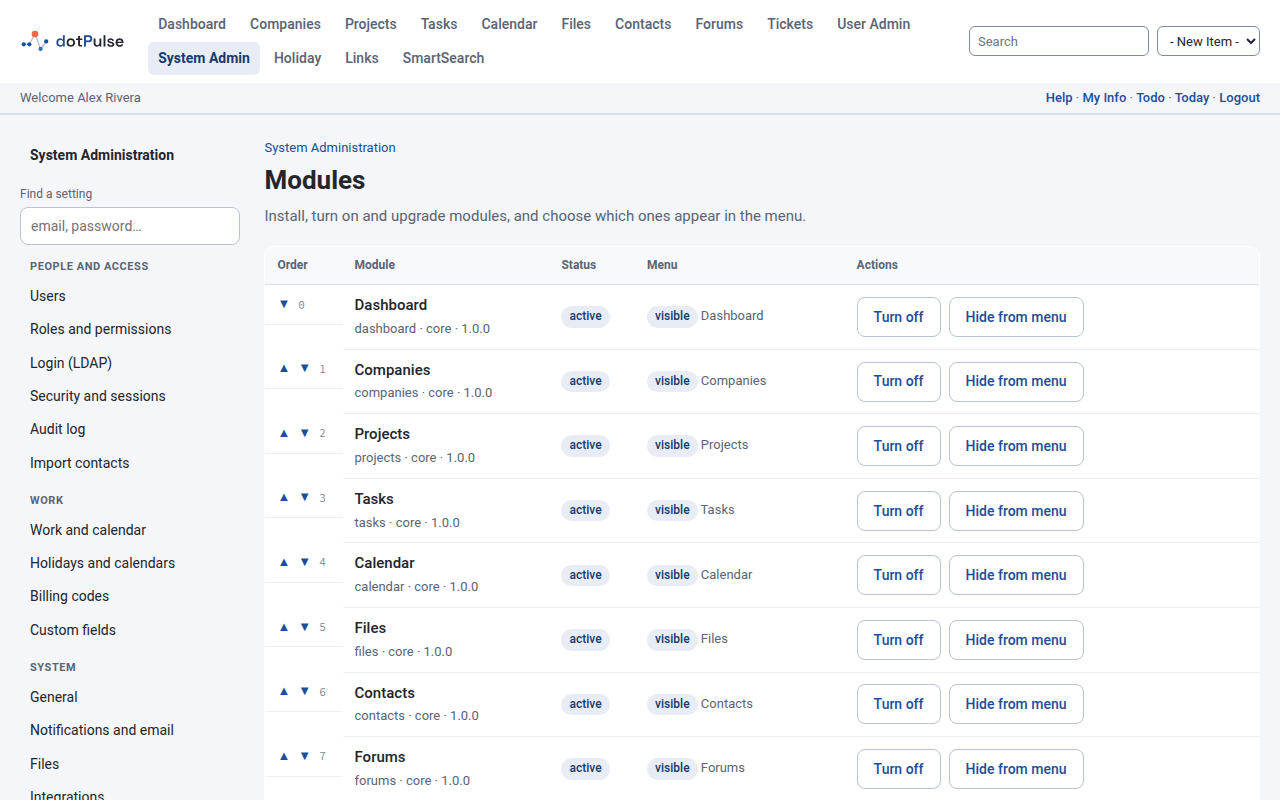
Open System Admin › Modules:
- Modules under Not installed are listed by folder name, with an install button. Installing a module creates its tables.
- Turn on and Turn off make an installed module available or not.
- Show in menu and Hide from menu decide whether it has an entry in the main menu.
- The arrows in the Order column move a module up or down in the menu.
- remove deletes a module and all its data.
A new module joins the admin or the non-admin modules, so the roles above get the same rights on it.
6. Set up holiday calendars
Holidays are not working days: task dates skip them. Each workplace can have its own calendar.
- In System Admin › Modules, install
holidayunder Not installed. If it then shows disabled, click Turn on. - Open System Admin › Holidays and calendars.
- In the Settings tab, choose the country whose national holidays apply to everyone without a calendar.
- If people work in different places, open the Calendars tab and click Add calendar. Give the calendar a Name, its National holidays, and say who it is For: companies, departments or users. A calendar can also build on another one, a city on its region for example, and import the days of an iCalendar (
.ics) file.
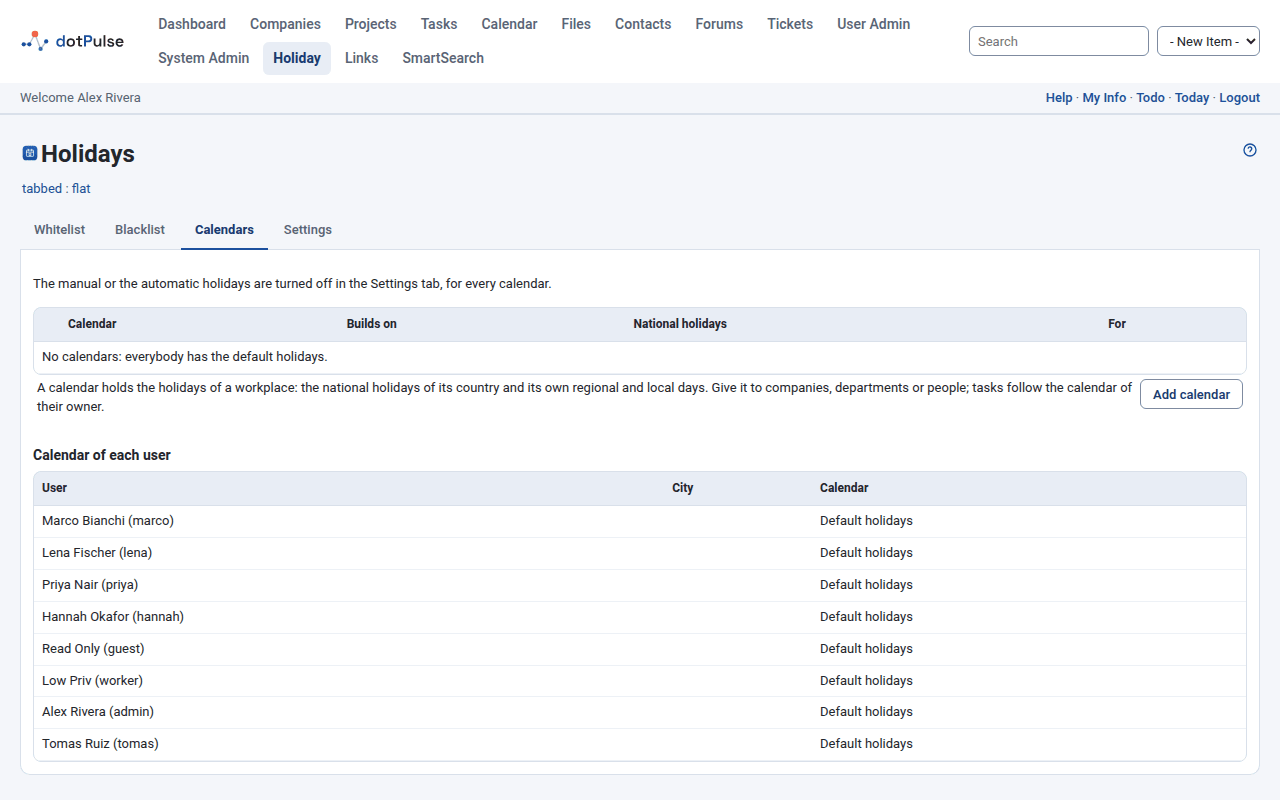
Each person follows their own calendar, else their department's, else their company's, else the default holidays. Task dates follow the calendar of the task owner.
7. Set up email
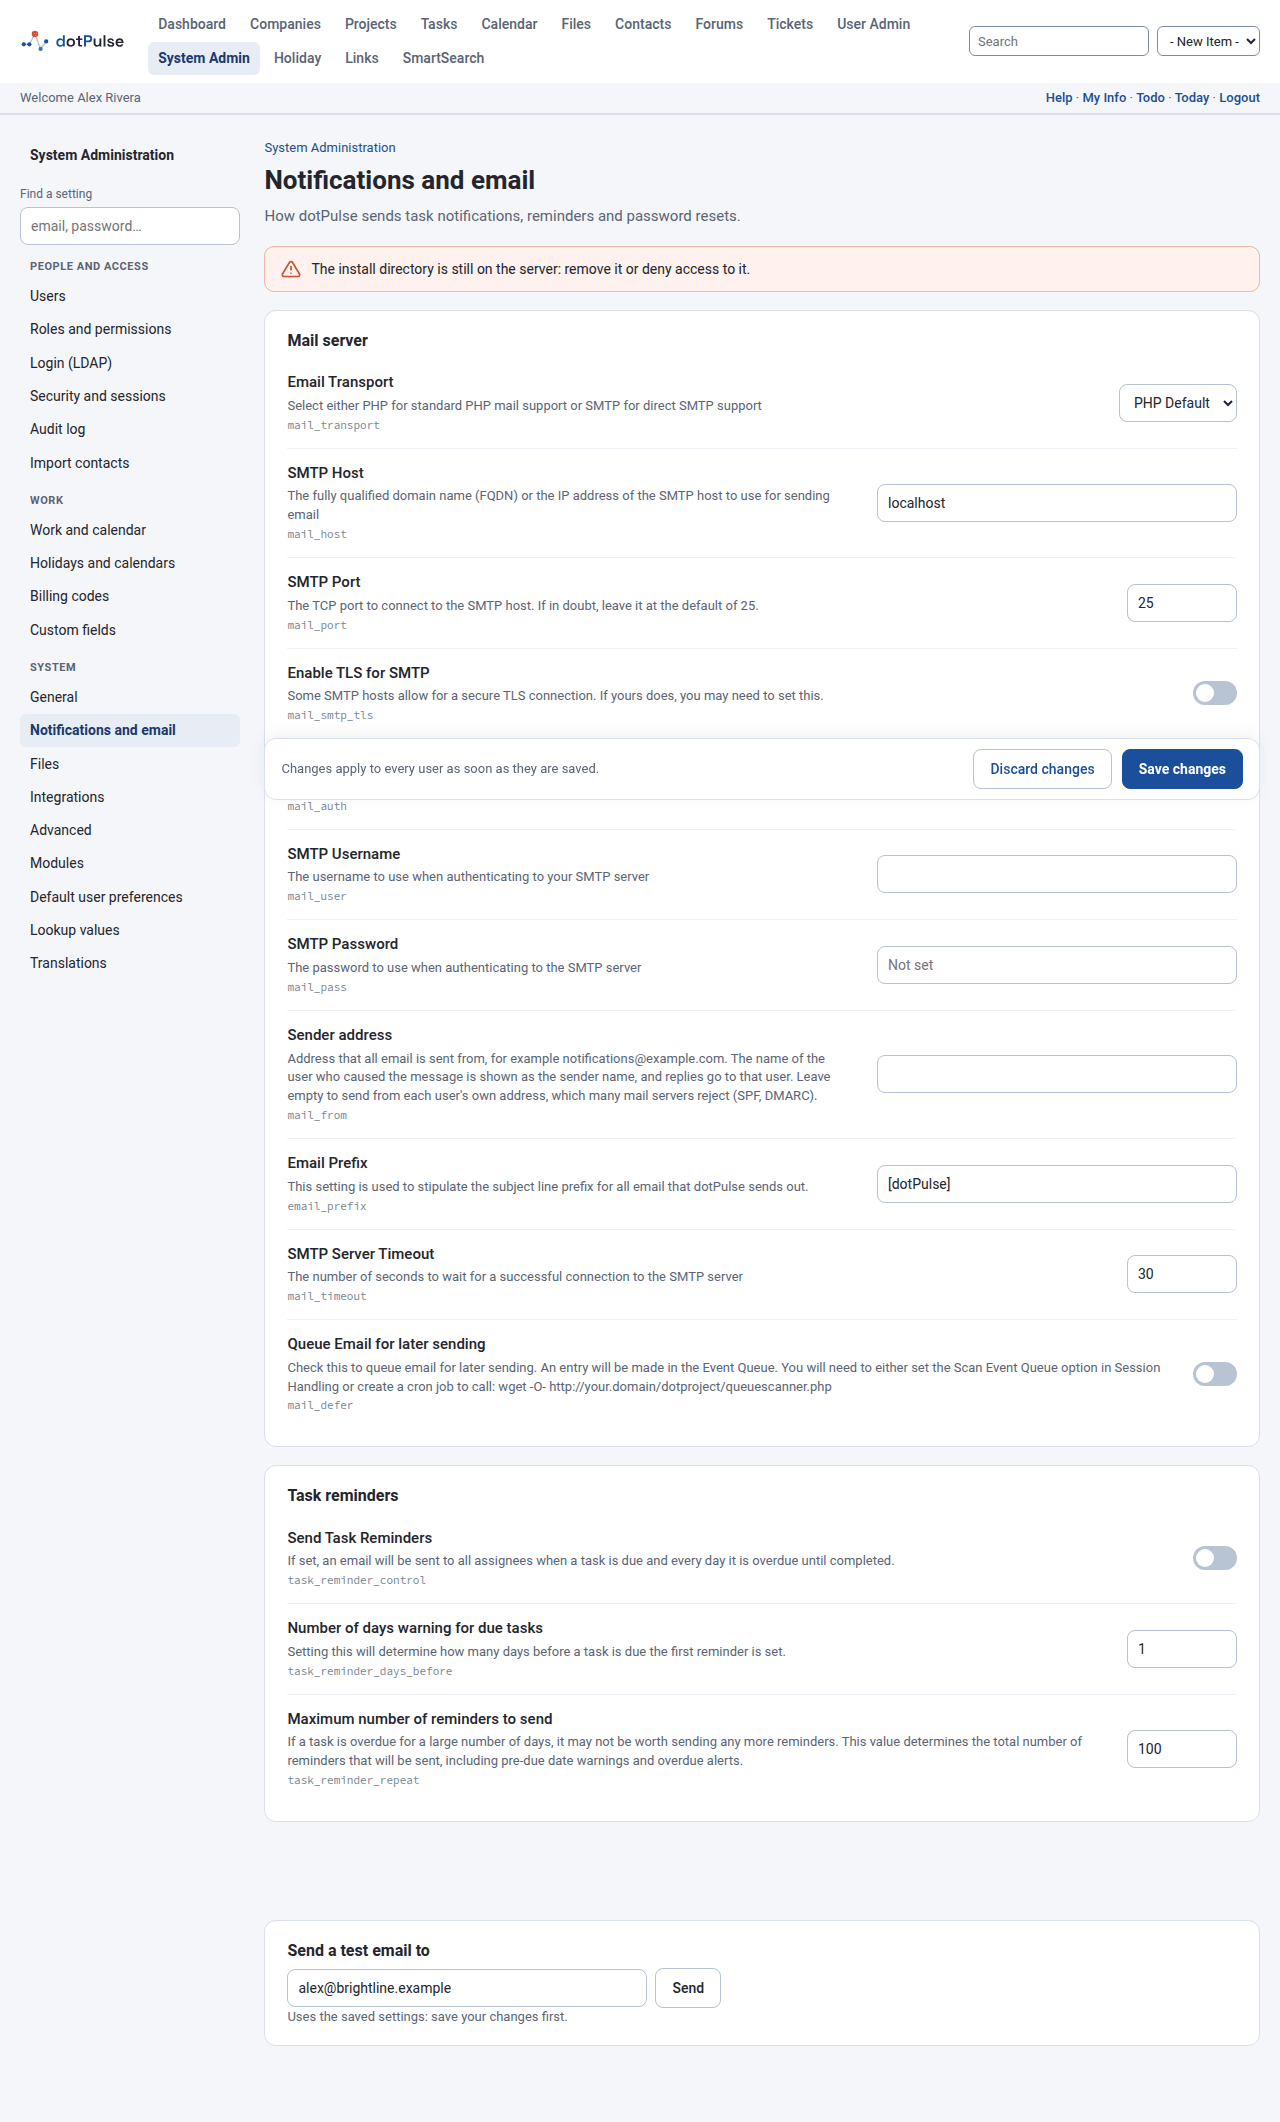
dotPulse sends mail for password resets, task assignments, notifications and reminders. Open System Admin › Notifications and email:
- Email Transport: PHP Default uses PHP's own mail setup; SMTP sends through your mail server.
- With SMTP, fill in SMTP Host and SMTP Port, tick Enable TLS for SMTP (port 587 uses STARTTLS, port 465 uses SMTPS), and tick Host requires login with the SMTP Username and SMTP Password if your server needs them.
- Sender address: the address every message is sent from, for example
notifications@example.com. Use a domain whose SPF and DKIM records allow your mail server. If you leave it empty, mail goes out from each user's own address and is often rejected as spam. - Email Prefix: the start of every subject line. Default: [dotPulse].
- Send Task Reminders, in Task reminders, mails reminders about tasks that are due.
Click Save changes. Then enter your address in Send a test email to at the bottom of the page and click Send. If it fails, the page shows the mail server's error.
The cron job
Task notifications, assignment mails and reminders are only sent when the cron job runs queuescanner.php. See Installing.
8. Create your first project
- Click Projects in the main menu, then new project.
- Give it a name, choose its Company, set its dates and owner, and save.
- Add its tasks and assign them to your users.
The Projects and Tasks pages of the User guide explain every field.
Your site is ready. Point your team to the User guide.